Saturday, November 24, 2012

Week 30: 2nd Down on the 3-yard Line


We were in California all this week and express our thanks to Susan and Chris for taking all of this week's blog photos before departing on their Thanksgiving trip to Portland.  In this photo you can see the east wall of the kitchen complete except for the dishwasher (resting in the garage), the refrigerator (to be delivered the day after the photo was taken), and the windows (resting upstairs while the paint dries).  To the left of the sink you can see the ceiling fixture that normally hangs in the living adjunct.  It turned out that our design for grid boards on the living room and living adjunct ceiling changed the ceiling dimensions and caused the fixture to be off center by a couple of inches.  For aesthetic purposes, a couple of inches is the same as a couple of miles, and we therefore asked that the electrical box for the fixture be moved so that it was exactly centered in the space defined by the grids.


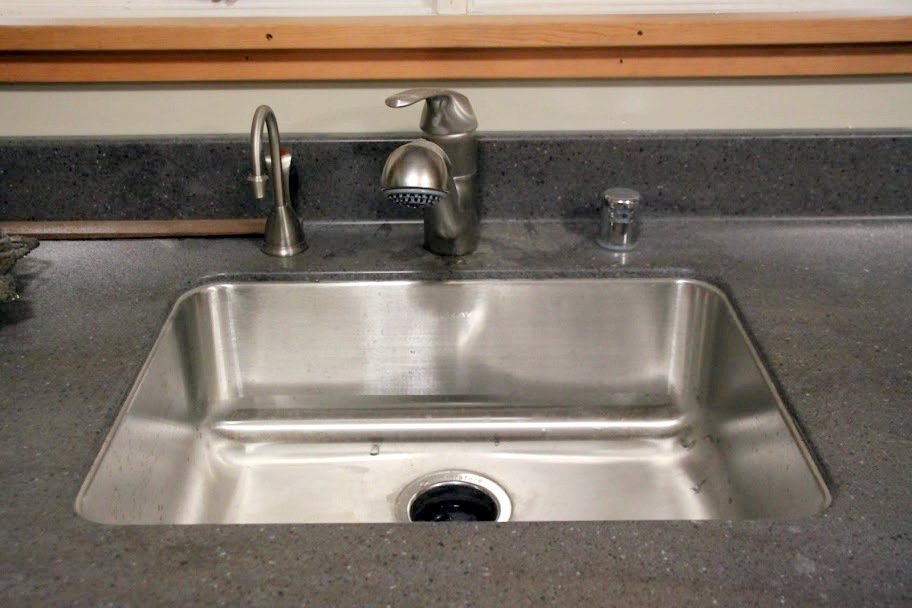
A close-up of our new single bowl stainless steel sink that replaces the old dreadful porcelain double sink.  We are pleased to see that the garbage disposal, insta-hot water mixer and dishwasher overflow have also been installed.


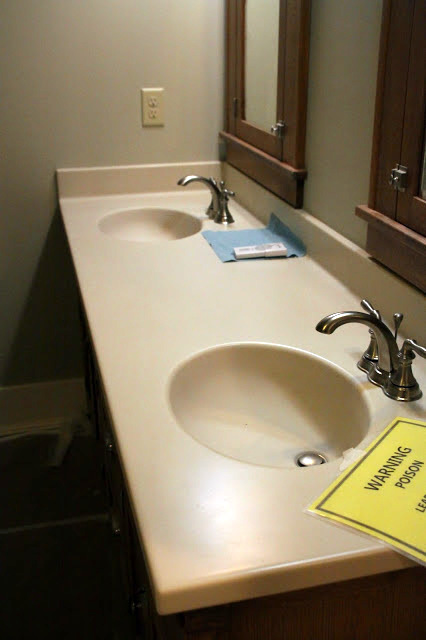
The vanity countertop and water mixers installed in the upper bathroom.  The kitchen countertop is Corian.  This vanity countertop is a different material called Hi-Mac.  The sinks and coved backsplash are all an integral part of the countertop. so there are no seams to keep clean.


Susan took this photo for the benefit of anyone who wants to see what the inside of a doorbell looks like.  When we bought the house, the original doorbell had long since been disconnected.  We had used a wireless doorbell that worked ok, but the remodel gave us an opportunity to hard wire a new doorbell, the chimes for which are located in two locations--one downstairs near the kitchen and the other upstairs near the BB's and BP's offices.  This way, many years from now when we're old and deaf, we will hear the doorbell.  Of course by then we'll be too feeble to do anything about it.


A blazing fire in the gas fireplace.  The unit still needs to be trimmed, and we still need to address an issue that came up several months ago, which is that the fireplace radiates heat up into the kitchen cabinet installed above the brick fireplace base.  We think some additional venting is probably needed.


Now that we're getting down to the short strokes, there are numerous small items that need to be completed but are so varied that it's hard to keep track of them.  Lately we've been finding written checklists here and there around the house.  We think this particular checklist is something Dylan wrote down.  Throughout the project we've appreciated this attention to detail. 


This photo shows the new air return for the basement furnace.  Note the nice wood frame that the floor installer placed around the return box.  Metal trim has been added recently.  There remains a grate that will cover the opening.


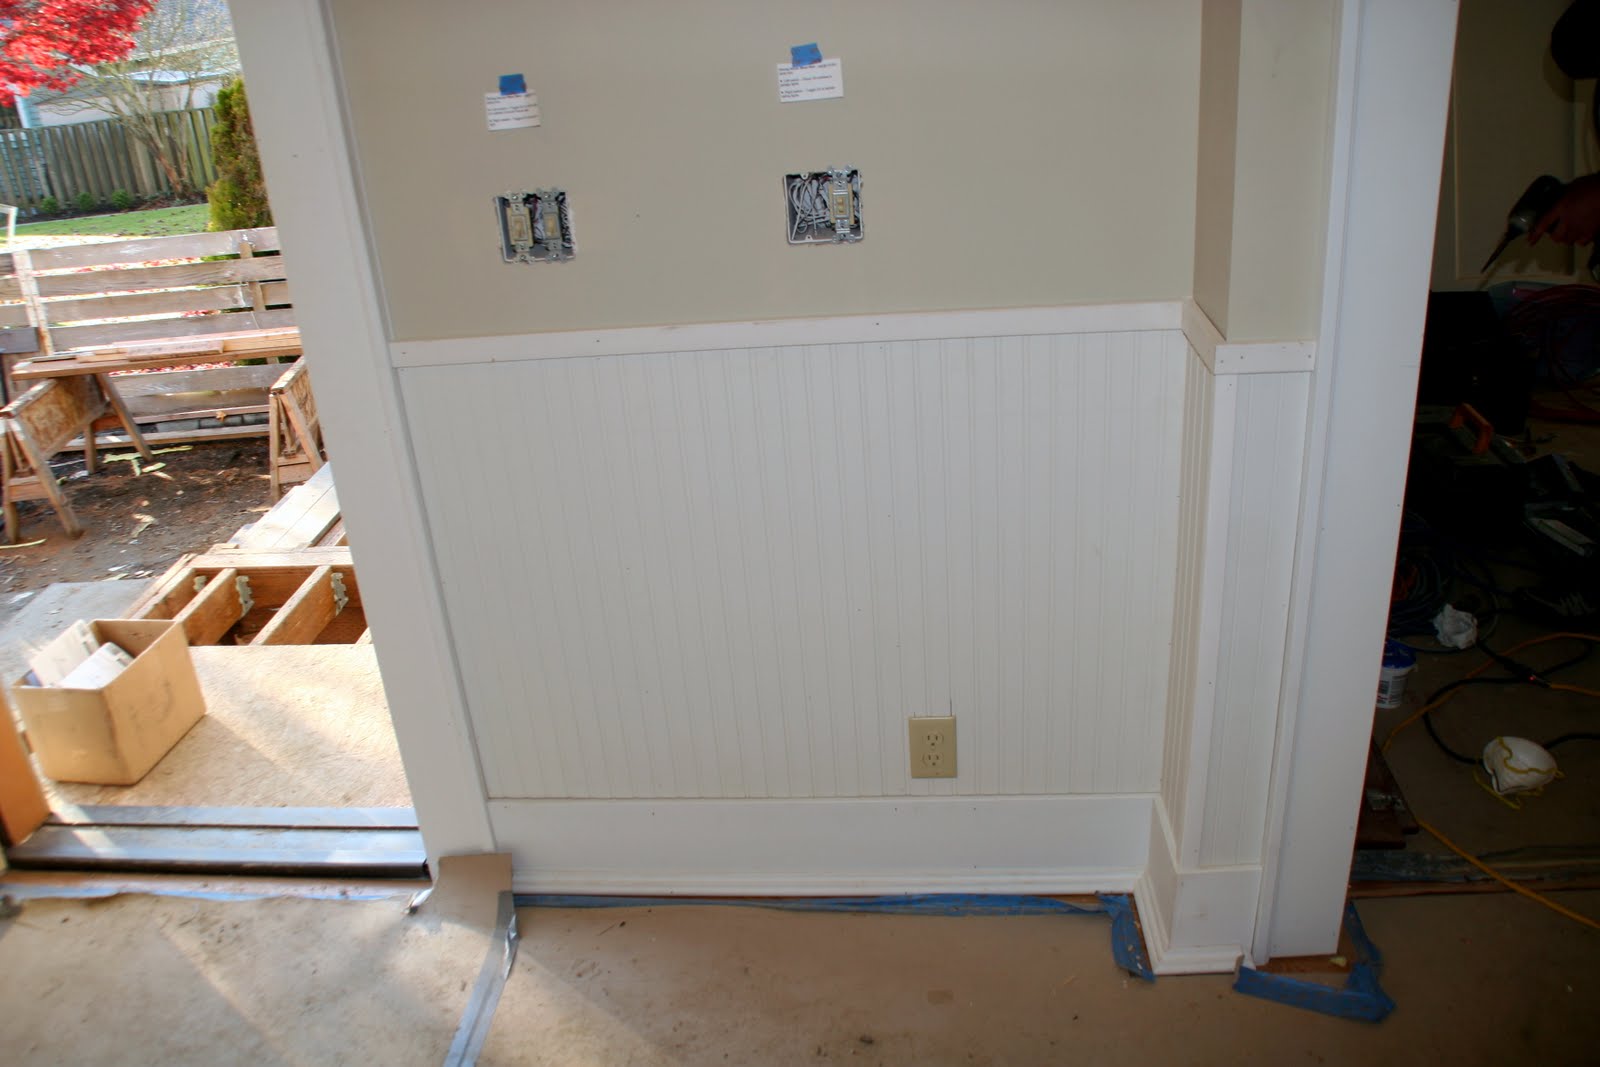
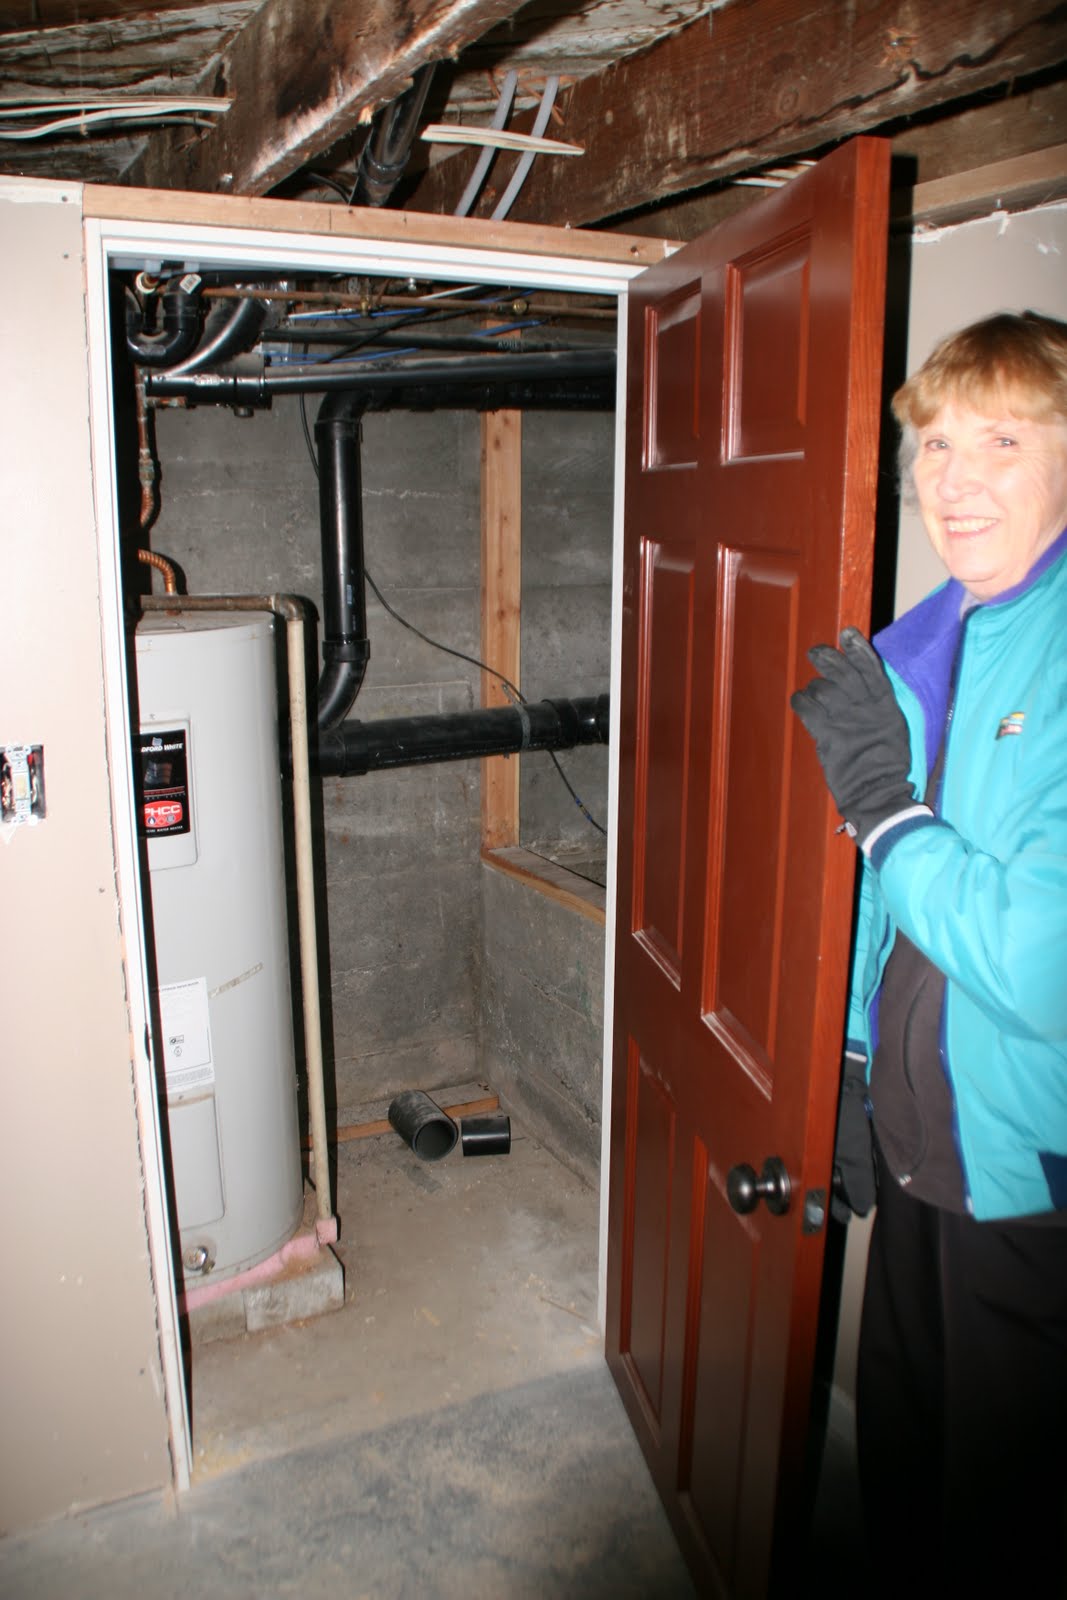
This is a photo of the inside of the new coat closet that's under the staircase.  The photo shows the plywood door held closed by spring catches for access to a quite large storage space under the stairs.  One simply opens the spring catches, moves the plywood door aside, and enters the space.  Our original intent for the space was to store such things as Christmas ornaments, wrapping paper, etc.  Maya and Zoe have preempted the space, however, as they have declared it to be perfect as a playhouse.


Susan took this photo to show the beautiful new oak floor in the downstairs bathroom.  The original floor was fir that had been painted an awful gray and had decades of stains and scars.  The new floor really brightens up the room.  In the upper right corner you can see that the vanity for this bathroom has been reinstalled.


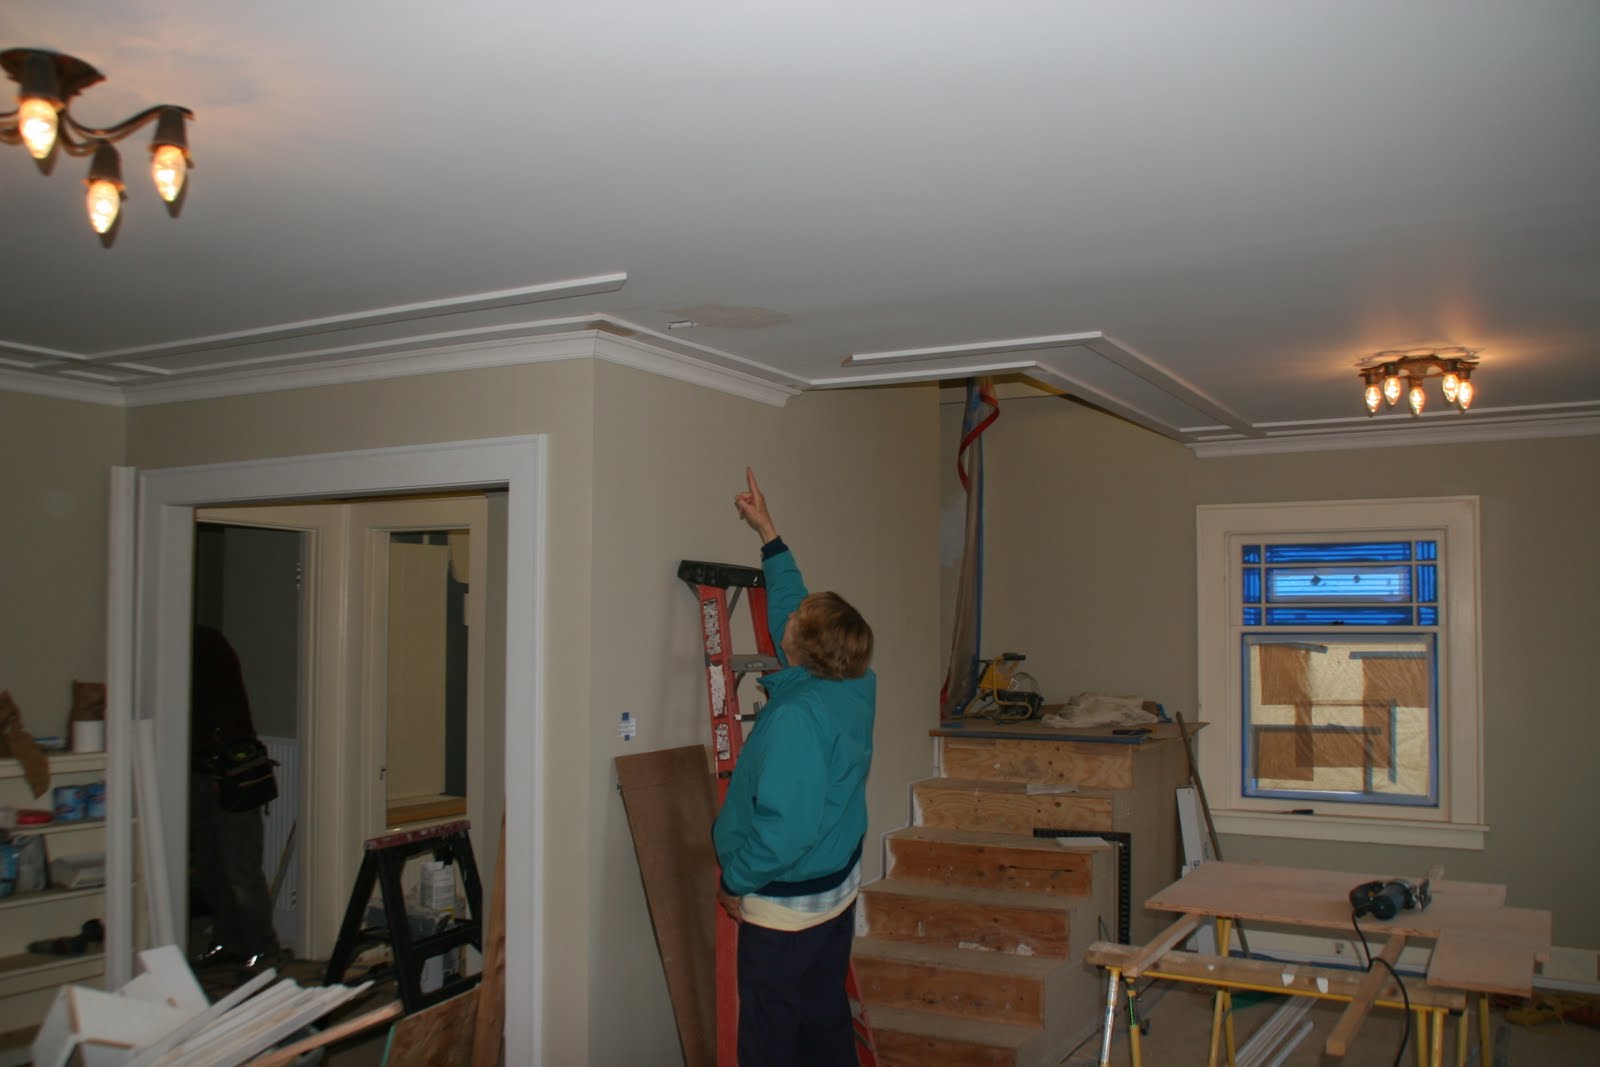
This photo shows a portion of the ceiling grids and crown molding in the living adjunct.  The main thing to notice in this photo is the beautiful mitred end cap that has been fashioned for the termination of the crown molding at this location.

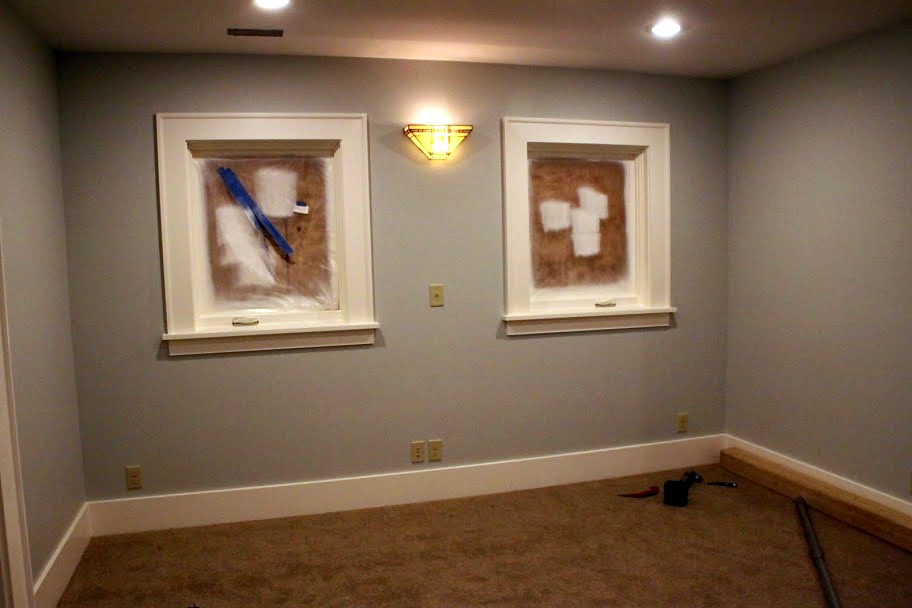
Susan took this photo to show how beautiful the door trim looks after two coats of satin Alkyd paint have been applied.  To obtain a glass-like finish, the painters have sprayed all of the window and door trim, and the effect  is astonishing.


For the last many months whenever the subject of carpeting has come up, we've always been quick to note that carpeting comes at the end of the project.  As a result, we are thrilled to realize, and this photo evidences, that we are that close to the end of the project!  This photo was taken from the south end of the second floor looking north towards the BB's and BP's offices.  The entire second floor is being carpeted except for the bathroom, which has a tile floor.


The new upstairs furnace has been operating for a couple of weeks.  The painters have been leaving the furnace on to keep the upstairs warm and speed the drying of the doors and windows that are being painted upstairs, as well as the upstairs window and door trim and baseboards that have also been recently painted.  This photo shows the thermostat for the upstairs furnace.


A photo of the BB's office, showing the carpet being installed there.


A photo of the library showing the carpet being installed there.


And a photo of the master bedroom showing the carpet installed there and also showing the wall sconces recycled from the original living room.  In all of these photos of the carpet, the carpet appears to be brown.  In fact, the carpet is much lighter in color and has a quality about it that seems to change color, depending on the light, time of day, and color of the walls in the room concerned.  On several occasions, the BB and BP have tried to describe the color to others, and not once, to date, have they been able to agree on what the color really is.  We liked the carpet so much that we installed the identical carpet in the upstairs of our new condo in Davis. 


A photo of the north half of the new walk-in shower showing installation of the spray fixture and two of the three control valves.  The third control valve has not yet been installed because the tile crew needs to modify the opening for that valve so that the valve will fit properly.  There is no photo of the south half of the shower (where the fixed shower head is located) because, as you will see in the next photo, the bathroom has become the main storage area for windows and doors now that carpet is being installed in all the other spaces on the second floor.

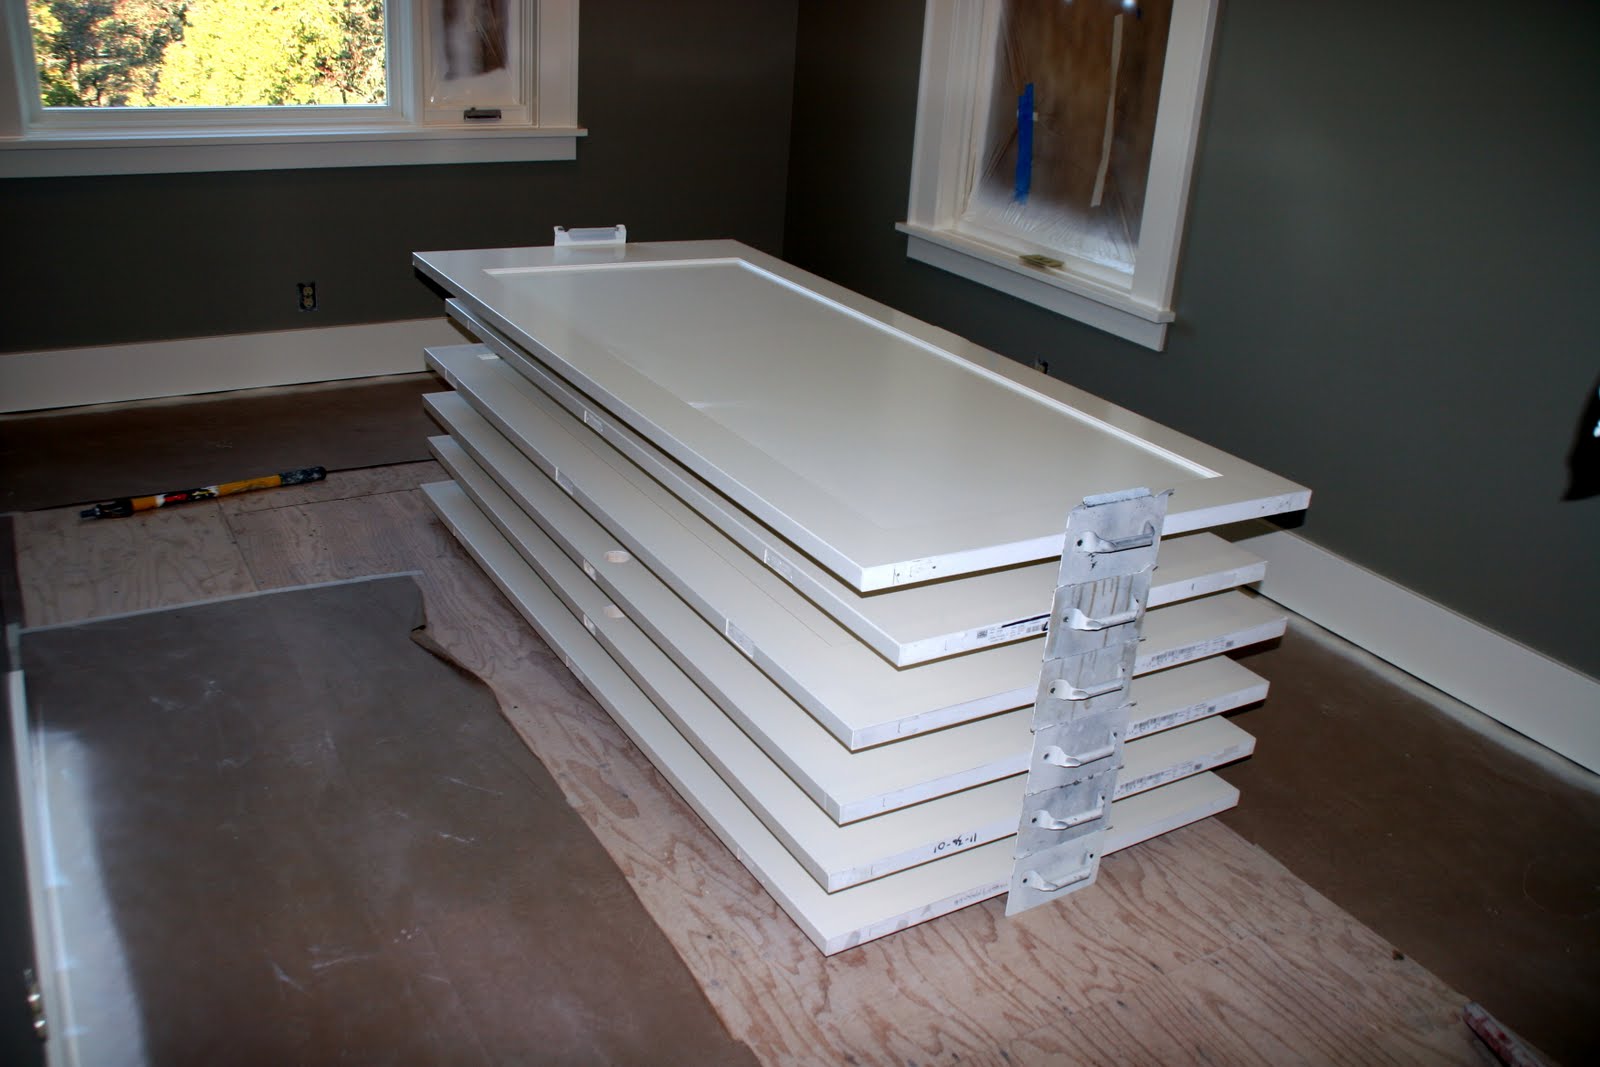
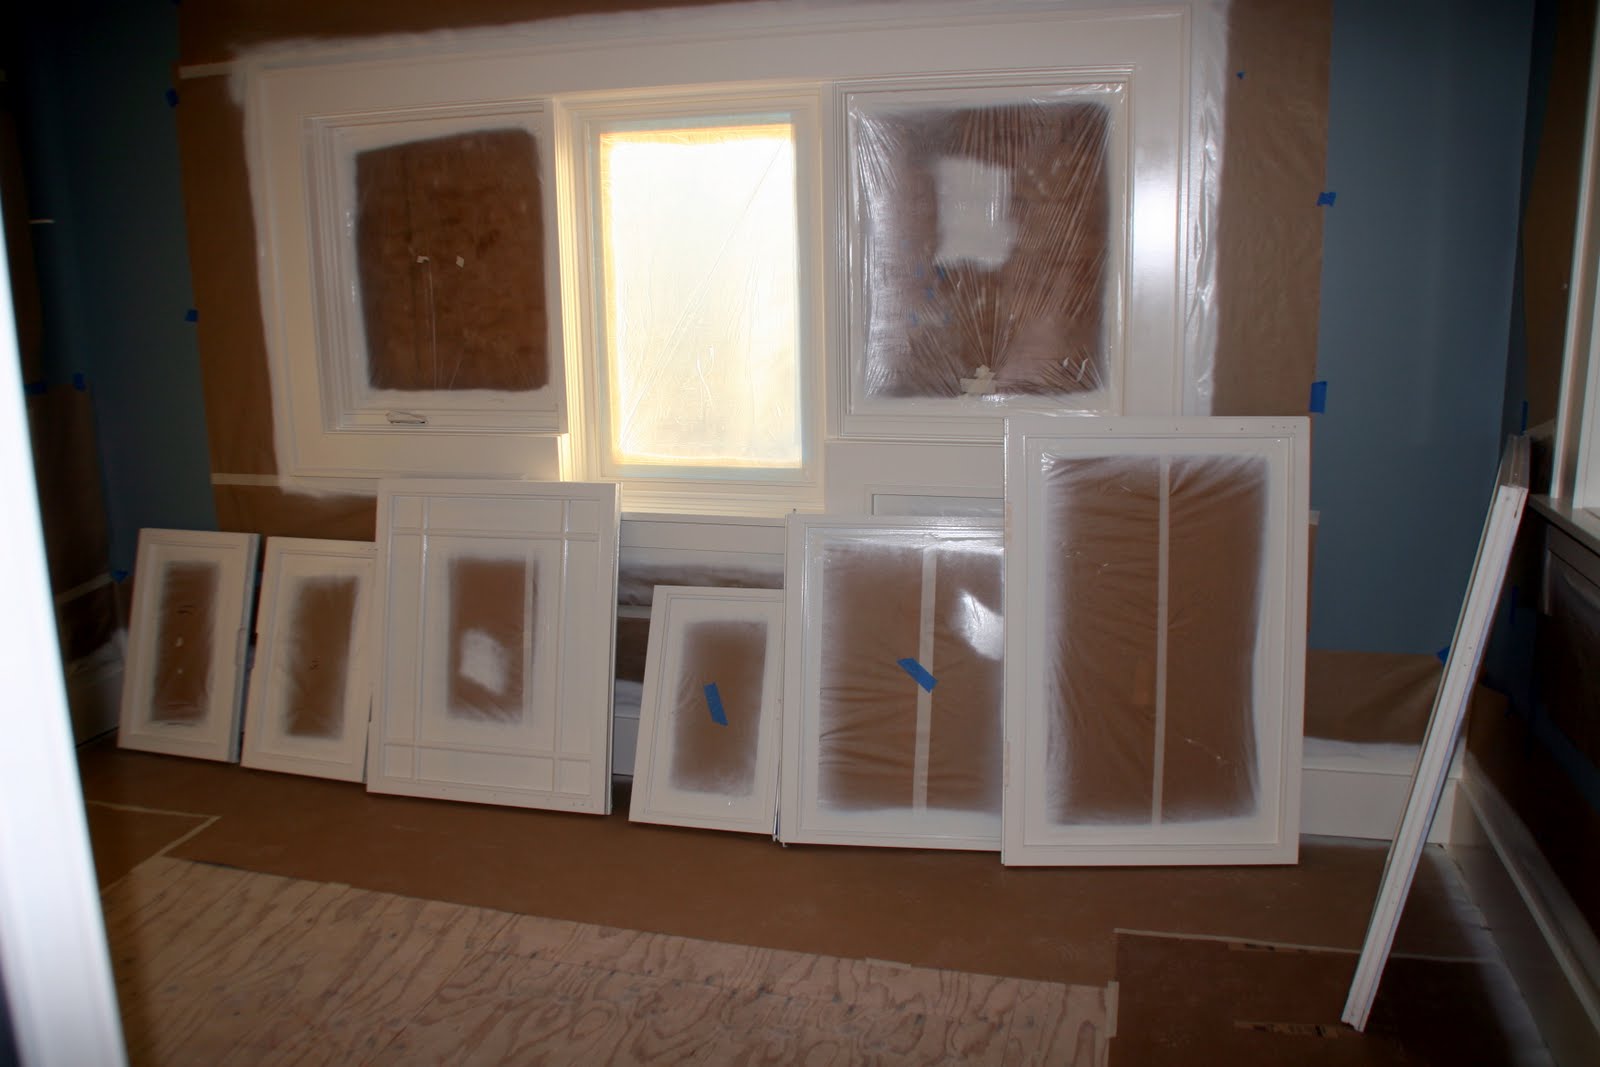
This photo shows the doors and windows, all of which have been painted with Alkyd satin paint, drying.  To ensure that the paint fully cures, the painters have recommended a drying time of two weeks before they are reinstalled.


This is a timer control installed in the bathroom to govern the oversized exhaust fan that's being installed in the bathroom.  The local building code requires that such a fan be installed in a strategic location (in our case the bathroom is the best location) and placed on timer so that at regular intervals throughout the day, the exhaust fan automatically goes on, creating negative pressure in the house and thus drawing fresh air into the house through vents.


To remind themselves where the various windows came from that were painted and are now being stored in the bathroom for drying, our contractor put together this nifty schematic drawing.  Each window has a small piece of tape with a number on it, and the numbers on the windows correspond to the numbers on this drawing.


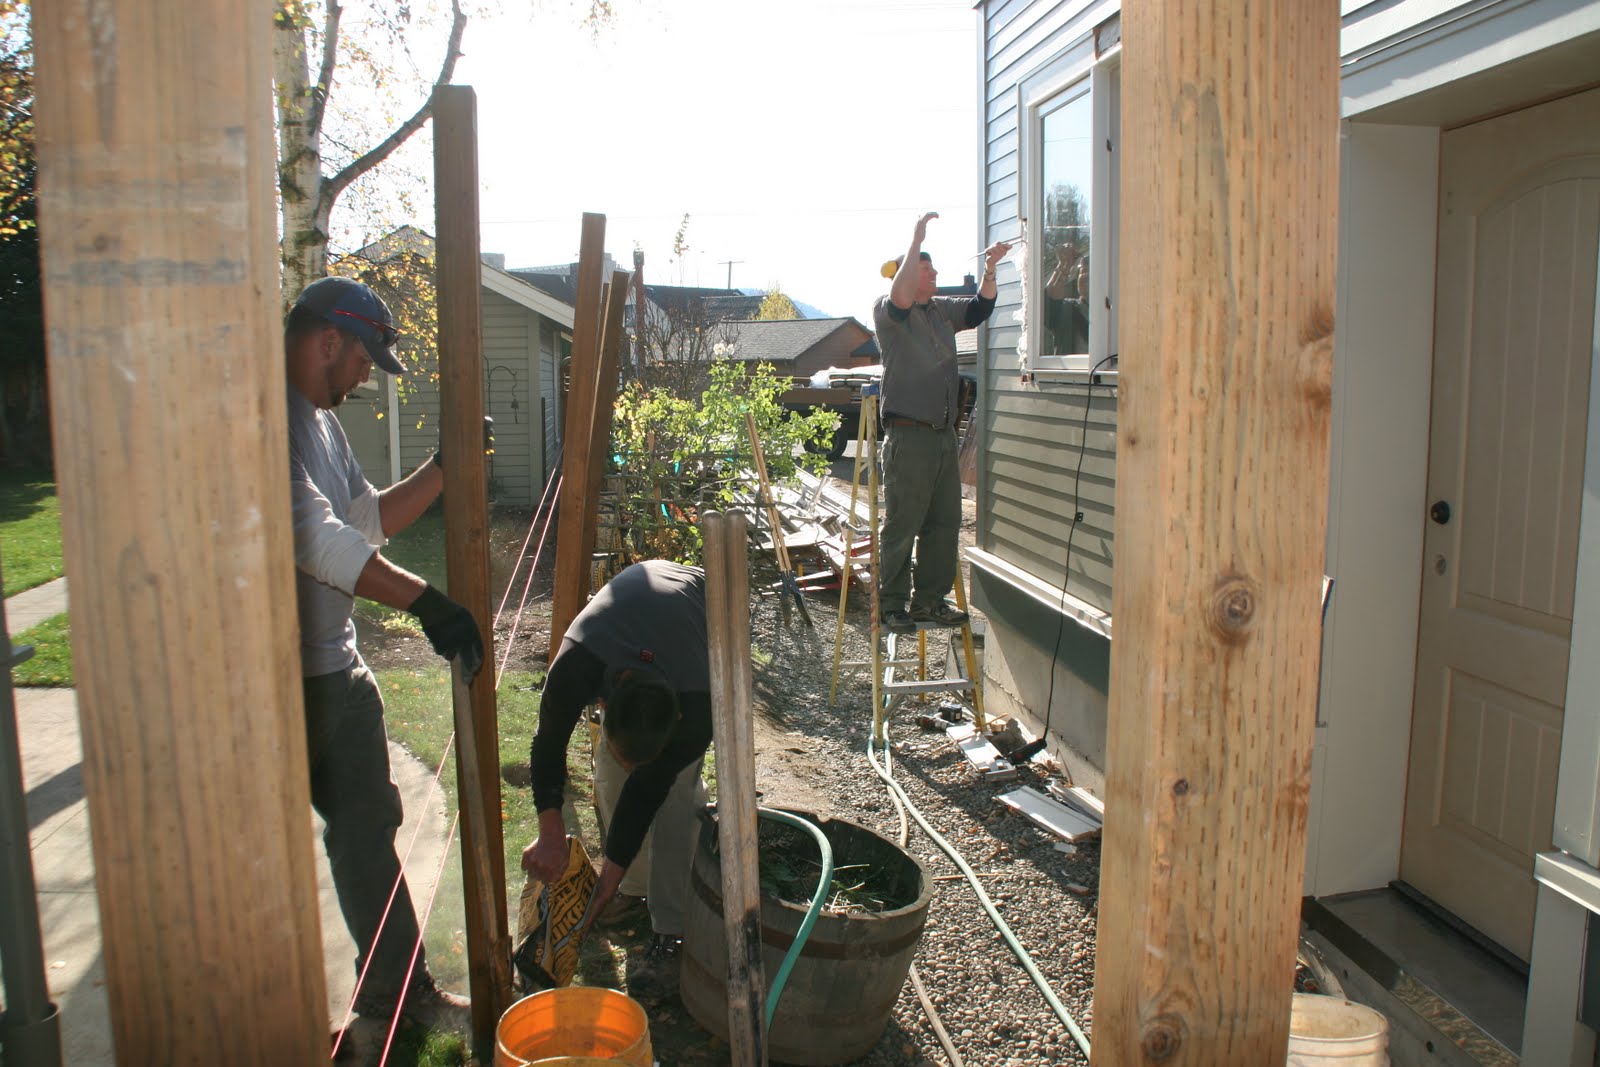
This photo shows the progress being made on the reinstallation of the "Andy Rodrigues" back porch.  It has been wonderful to see that the location of the back door is so close to the back door of the original house that the porch location has moved only an inch or so, and we've been able to reuse all of the infrastructure that Andy built back in 2007.


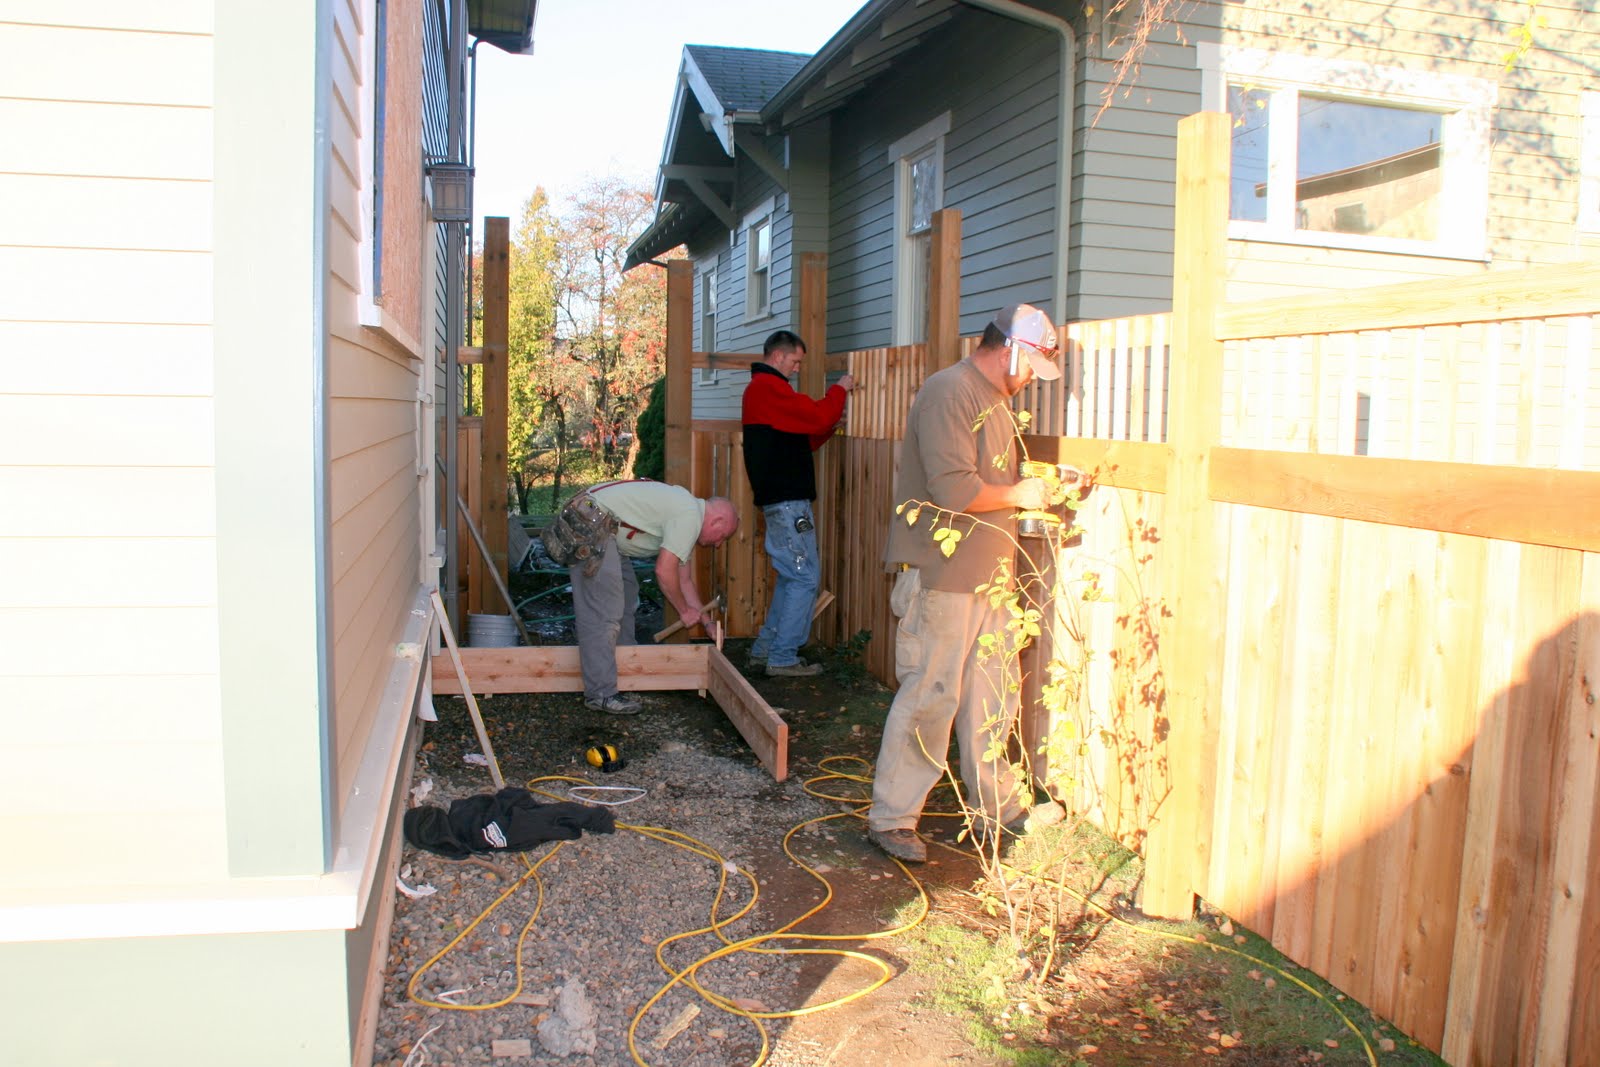
The new fence is complete and looks wonderful.  The builders followed exactly the design of the rear fence that Andy Rodrigues built for us in 2008.  This photo was taken from the front yard looking south and shows the fence between our house (on the right) and our neighbor's house (on the left).  You will see two gates in the fence.  The gate on the right is a 3' gate into our backyard.  On our neighbors' side of the fence, there was just room for a small 2 1/2' gate, and our neighbors elected to add it to the project.  So the gate that you see on the left opens into their backyard. 


This photo shows the middle and southernmost portions of the new fence between us and our neighbors to the east.


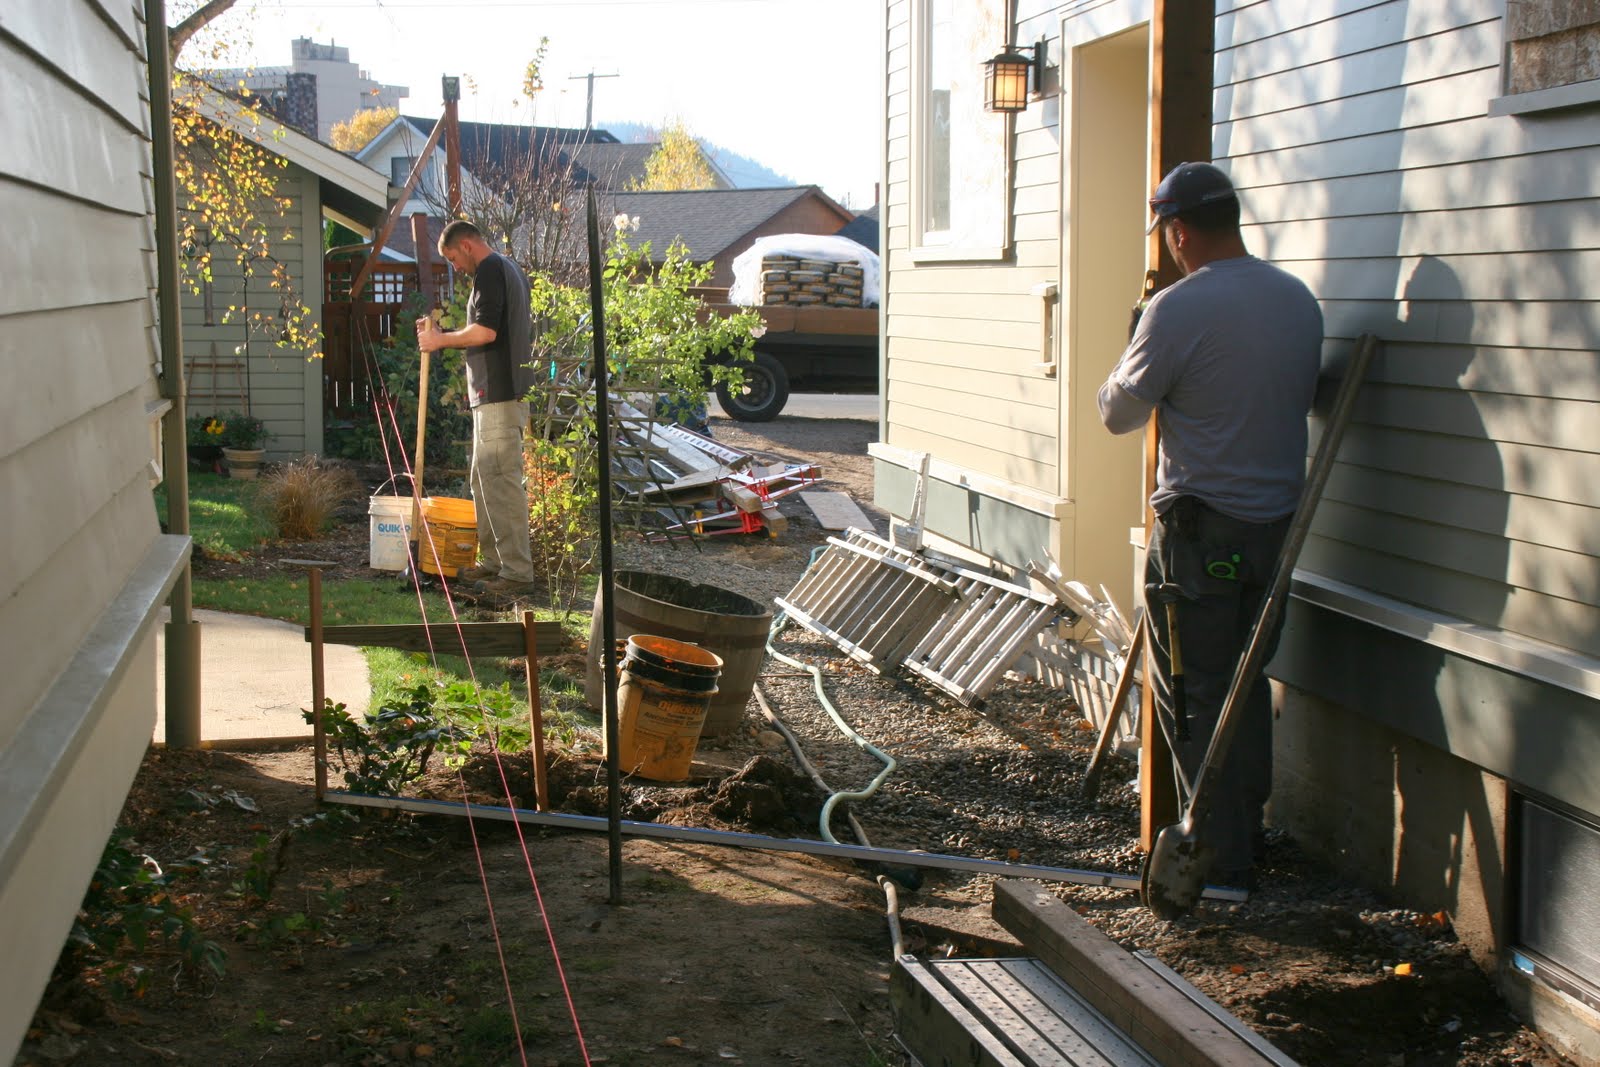
This photo looks north from our backyard.  The 3' fence gate that you saw in the earlier photo is in the upper left of this photo. The framing and rebar that you see is for a concrete pad and ramp that will serve the exterior door for the elevator.


This photo shows that the original fence built by Andy Rodrigues in 2008 has been fully reinstalled.  There has been one slight modification, which is that the small gate at the far end of the fence (nearest our garage) has been moved about 18" east to fit better with a changed location of the walkway that we plan to install.


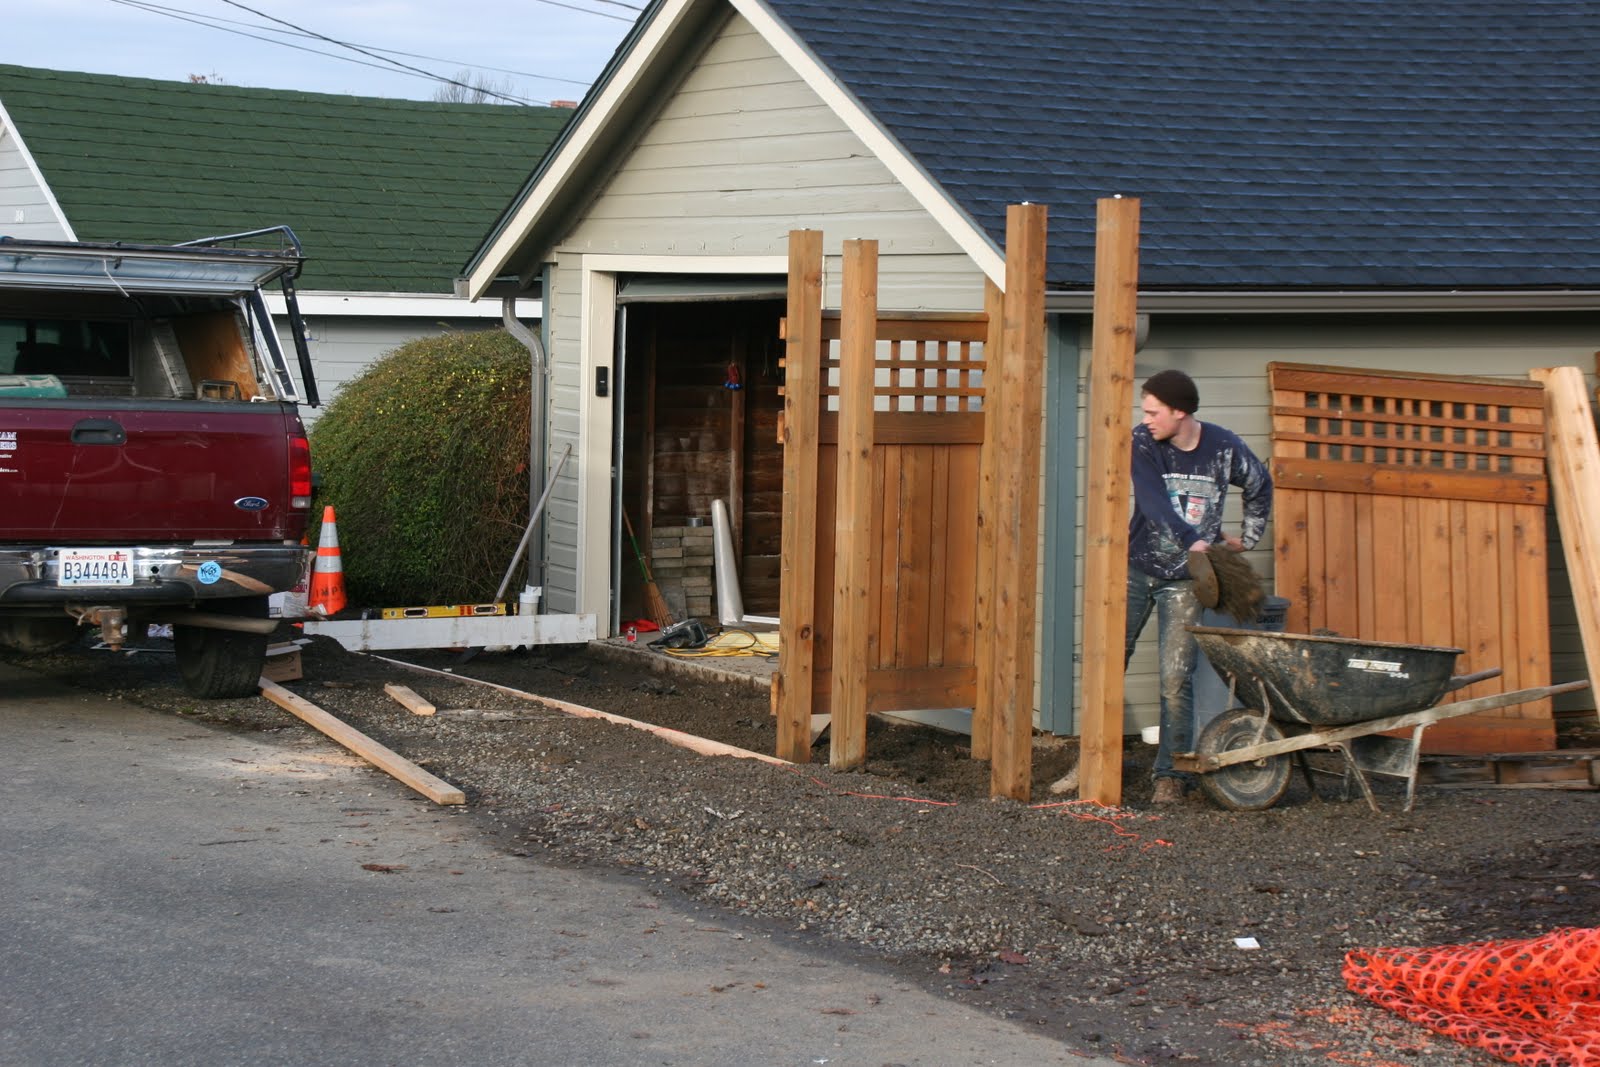
The final element of our comprehensive drainage plan consists of a concrete apron in front of the garage door, with the drain grate that you see in the upper right hand corner of the photo.  This grate is connected to the 4" drainage pipe that runs around the garage and empties into the exterior sump.  The surface of the concrete apron will be sloped towards the drain grate.  The purpose of this final element is to prevent water from pooling in front of the garage and during heavy rainstorms, entering onto the garage floor.


This photo shows a continuation of the concrete apron in front of the garage door.  The apron will continue into this area to form a concrete pad in front of the back fence gate.  This pad will also stabilize the posts that support the gate.  In the past, those posts have tended to move in the soft ground that characterizes this part of the yard.  We believe the concrete pad will prevent such movement in the future.

Sunday, November 18, 2012

Week 29: Counters, Trim, Fences, and One More Drain


The countertop fabricators arrived on Monday.  In this photo, the fabrication crew are putting the finishing touches on the kitchen countertops--Corian "Lava Rock". 


This photo shows our new countertop (and new stainless steel sink) on the east wall of the kitchen.  The countertop has coved 4" backsplashes.  We will be installing tile between the top of the Corian backsplash and the bottom of the upper cabinets.


This photo shows the countertop on the west wall of the kitchen.  Our new gas range will slide into the gap between the two base cabinets.


The countertop fabricators also installed this laminate tabletop on the worktable in the BB's office.  The framed enclosure beneath the table top is a large "cubbyhole" that can be used for storage of art or sewing supplies.  Below the cubbyhole is headroom for the staircase from the first to the second floor.


Ditto


A lot of trim was installed this week.  This photo shows beaded wainscoting installed in the dining room plus the shoe molding installed at the base of the baseboards.  The shoe molding is an exact replica of the molding in the house in 1925.


Ditto.  By the way, the doorknob on the elevator door is not the final hardware that will be installed on the door.  This was a cheap substitute installed to enable us to have the elevator inspection this week.  Unfortunately, the elevator folks failed to tell us until 7 a.m. of the morning of the inspection that the state elevator inspector would not conduct an inspection until the city electrical inspector had passed the electrical sub panel that is installed in the elevator machine room.  As a consequence, we missed the opportunity to complete the elevator inspection this week, and it will happen some time after Thanksgiving.

This photo shows the wainscoting and shoe molding on the west wall of the dining room.  We love the way that Dylan and his crew have used fine mitered corners to apply this trim around various nooks and crannies of the dining room and adjacent space.
 
Meanwhile, crown molding is also being installed in the various first floor rooms.  In this photo, the BB points to crown molding being installed in the living room.  Also visible in this photo are the grid boards being installed in this room.


A view of some of the grid boards, including the corner squares, that are being applied to the ceiling of the new expanded living room.


Meanwhile, upstairs, the painters are still painting at a furious pace.  In this photo, Kevin masks the wall so that he can paint the baseboards.  All of the baseboards and door and window trim are spray painted.  The result is an incredibly smooth and beautiful satin finish that could never be achieved by rollers or brushes.  We understand the technique is not unlike applying paint to an automobile, and the result is every bit as pleasing.


In the BP's office, additional doors that have been painted are stacked for drying.


In the upstairs master bedroom, the wall sconces are finally in place.  These are recycled fixtures.  In the original house, they were downstairs above the fireplace.


You really know when a project is nearing completion when you find that it is time to begin restoring the fences around the yard.  In this photo, Sean and Derek, the fence subcontractors, are constructing a new relocated fence between our property and our neighbors to the east.  We are delighted to note that the fence builders are following exactly the design of the back fence that Andy Rodrigues designed and built for us several years ago.  We love the design, and our neighbors did, too, so it was an easy decision to use this design for the new fence.


In this photo, Sean and Derek work on the fence while Dylan sets the forms for a concrete landing and ramp that will serve the exterior access door to the elevator.


In earlier blogs, we have described in detail the extensive storm water drainage system that we've installed around the house.  The final piece of this system are drainage pipes running around the south and east sides of the garage and connecting to the exterior sump at the house.  We showed the pipes being installed in an earlier blog.  Now, to complete the garage drainage, we are installing a concrete apron at the entrance to the garage with a trench drain that drains directly into the 4" tight line that runs to the sump.  This apron also will be extended to the base of the first four rear fence posts to provide extra stability to those posts.  In this photo, Jake excavates the area where the apron will be installed.


This is another view of the excavation and the beginning of the forms for the concrete apron.  We departed for California on Friday of this week and will be gone for about 10 days.  During this time we anticipate completion of the fence, pouring of the concrete apron, and elevator ramp, and more painting and trim installation inside.  Susan will be taking a few photos during the short Thanksgiving week, and we'll be back in Bellingham on the 27th.  It's too soon to fix an exact completion date, but we're putting quite a few of our Berkeley furnishings on a moving truck heading for Bellingham on the 26th, and everyone is seeing that as extra motivation to reach at least substantial completion (subject only to a few punch list items) by the end of the month.

Sunday, November 11, 2012

Week 28: Now You See It, Now You Don't


This was a week when a lot of things were not in their normal places--mostly temporarily, in a few cases, permanently.  In this photo, there are two things missing.  On the main electrical mast shown on the left in this photo, there had been an old telephone line tied to the mast.  This was a landline that the local telephone company, Century Link, had used to serve the prior owners of this house.  When we bought the house, the line was never taken down, even though we never used Century Link.  At long last, Century Link came this week and took the line away.  The other things missing in this photo are the dining room windows and window frames.  As mentioned in an earlier blog, the windows are missing because they have been removed to an upstairs location where they are being painted.  The window frames are missing because we discovered this week that the dining room windows on the west side and the east side had been inadvertently switched.  The window units were not identical, therefore it was necessary to demolish all of the exterior trim, remove the entire mulled unit, and reinstall it on the opposite side of the dining room.  A quick word here about our contractor: Bellingham Bay Builders have made very few mistakes during this very long and complex project, and on the rare occasions where a mistake has been made, they have been on the phone to us to tell us about it immediately after discovering the problem.  We have really appreciated both the high quality of their workmanship and their integrity in those instances where a problem has developed.


At the end of last week we showed the disappearance of the old fence between our house and our neighbors' to the east.  This week the fence subcontractor arrived to set the posts for the new fence.  This photo shows two string lines.  The string line on the left runs along the property line.  We established a second string line, on the right, to create a 3" setback that would ensure that the entire fence was on our side of the property line.


Sean and Derek, the fence subcontractors, set new fence posts, while in the background, Dylan is engaged in the painful task of demolishing beautiful window trim and removing the misplaced east side window unit.


This is what dining room windows look like when they're not there.


The line of new fence posts, which were all in by midday.  The fence subcontractor will wait about a week to let the post cement cure and then will begin constructing the fence panels.  The design of the panels will replicate the fence design created by our friend, Andy Rodrigues, when he built our rear fence.


The fence subs also will be reinstalling the Rodrigues-built rear fence that was temporarily removed during our remodel to enable large vehicles, of which there have been many, to drive onto the property.  It is wonderful to be at a stage of the remodel where we can put Andy's fence back in place.  The old fence panels were preserved, and in this photo, the first of the panels is being reinstalled.


Another Rodrigues design feature is being preserved.  Andy designed and installed our rear deck, and we've been able to preserve the components.  The new side door is located only about an inch from where the old side door used to be, so we're going to be able to reinstall Andy's deck pretty much exactly as originally built.  In this photo, the first structural component of the deck has been installed.


The BB and the BP designed a system of crown molding and Craftsman grids for the living room ceiling.  Our project manager, Dave Brogan, assembled this mock-up so we could see how it looked on the ceiling and decide definitely whether we wanted to do it.  We loved what we saw, so this system will be installed throughout the new living room space.

The painters sealed off the second floor to create a dust-free area within which to paint the windows.  In the library in the middle of the second floor, they created this work area, where the windows are painted, and then after painting, they are distributed around the second floor to dry.  The second floor furnace is on full time to create a warm environment.  It became apparent last week that the windows would become a major pacing item.  Because the weather has changed to a much colder and wetter environment, it now takes a couple of weeks for the oil-based paint applied to these windows to cure.  Until the paint cures, the windows can't be reinstalled.  Until the windows are reinstalled, various other activities, particularly including work on the floors, can't be completed.


This photo shows one of the window drying areas--the master bedroom.


Another window-drying area--the BP's office.


The master closet has not only been serving as a window drying area but also a drying area for the painted doors.  This was the first time we'd seen the ingenious device used to stack the doors.  They're held in place by a screw inserted into the end of the door, leaving all other surfaces clear for painting.


The BP steps through the membrane that seals off the second floor.  Once through the membrane, the opening is closed with a zipper.


We have been delighted to be able to recycle many of the doors that were in the original house.  This photo shows the door to the downstairs coat closet.  This is a 1925 door.  Before the remodel, this was the door to the closet serving the BP's office. 


The BB stands next to another recycled door.  In the original house, the water heater had been enclosed in a space that was then framed by studs spaced 16" on center.  It didn't take the BP's expertise in physics to figure out (1) that access to the water heater was difficult, and (2) if the hot water heater ever needed to be repaired or replaced, it would not fit through any of the stud bays.  So we constructed an access doorway, and we're delighted to be able to use the door that had been the door to our attic bedroom.


This is the alarm that would go off in the event of a failure of the pumps in the exterior sump.  The good news is that the alarm will go off if the sump pumps malfunction.  The bad news is that we have no idea what to do if the alarm goes off.  We're working on it.


It took a while to convince the electricians that we weren't crazy.  We finally got them to understand that we wanted to install two timers.  One controls several lighting circuits upstairs, and the other controls a lighting circuit downstairs.  When we are traveling, we set the timers so that lights go on both upstairs and downstairs and turn off at different times.  We think that it creates a helpful illusion that we are at home to discourage any aspiring burglars.


The wainscoting panels for the dining room have arrived.  A couple of the panels have already been installed.  The remaining panels are standing on end being "climatized" in a manner similar to the climatization of the new oak floors.


The BP tries out the telephone in the elevator.  The good news is that we have a telephone; the bad news is that there was no dial tone.  We're working on this, too.