|
| The week began early on Monday with Vlad in a frantic scramble to get the new electrical mast, panel, and ground installed and inspected so that the local electrical utility could arrive later that day to disconnect our temporary power set-up and attach the power wires permanently to our new mast. In this photo, Vlad is completing the installation of the two stainless steel ground rods. |
 |
| The "home run" wires now disappear neatly into the new electrical panel in the basement. It is a 200-amp service with many new circuits, including two circuits on timers (so that we can have lights go on and off when we are away), and dedicated circuits for the outlets in each of our offices so that our computers will have dedicated electrical power sources. |
 |
| This photo shows completion of the installation of the mast. It is several feet taller than the previous mast. |
 |
| Another "jaws of life" type tool. This tool, which is battery operated, is the power crimping tool used by the electrical utility crew to splice power cables together. You put wires into each end of a sleeve and then put the mouth of the tool on each end of the sleeve, press the trigger, and the crimping tool automatically crimps the sleeve to the exact amount needed, the tool beeps, and turns itself off. We wanted to take a photo of the utility crew working on the change-over from temporary to permanent service, but they were camera shy, so this photo of the crimping tool will have to do. |
 |
| The temporary power pole is now empty except as a temporary tying off station for the TV cable that is yet to be installed. |
 |
| The meter and power line are in, and we now have permanent power! Since the electricians have not yet installed all of the outlets and light fixtures, only two circuits have been powered on. These provide a couple of outlets in the kitchen, to which the construction crew can connect their extension cords. |
 |
| The other major development this week was the arrival of the superb team of painters to put the primer and first coat of paint on our interior walls and primer and two coats of paint on our ceilings. They will return later to apply a second coat of paint to the walls and to paint the trim. Byron Seeger and his crew are some of the best subs that we've had on this project. They followed our paint specifications meticulously, worked amazingly fast, turned out beautiful work, and did all of this with wonderful good humor. What a pleasure! |
 |
| The BB admires her new office color, "Lily Pad". It's obviously the Monet influence. |
 |
| The BP exults in his office, newly painted with "Sandy Hook Beige"--obviously the Sandy influence. |
 |
| The bathroom is "Coastal Fog", which is not a reflection of our condition in the early morning, but rather a lovely color recommended to us by Sue and Chris, who have used it in their house. |
 |
| The BB recoils in horror at what was supposed to be a subdued blue for our bedroom. Just shows you can't trust paint chips. |
 |
| We made an initial attempt, based on another paint chip, to try out a more subdued blue. The result was mainly an unsightly blotch on the east wall of the bedroom. So, another trip to the paint store. |
 |
| This time we came home with four samples--three different blue shades, and one beige shade that Sue and Chris had recommended to us as a Plan B in the event we couldn't find a satisfactory blue. We pulled scraps of wood out of the discard pile and painted samples. While we were about it, we also painted samples of the exterior colors that we are considering. More on exterior colors in a later blog. In this picture, the BB is putting finishing touches on the various samples of blue. |
 |
| Here, the BB compares the various samples against the bedroom wall. We finally found the color that we feel will work well in this room. The room is tricky because there is a lot of light when the sun is out, but then the room gets quite dark when the sun isn't out. We need a blue that works at both extremes. We arrived at Benjamin Moore's "Van Courtland Blue", on the far right in this photo. |
 |
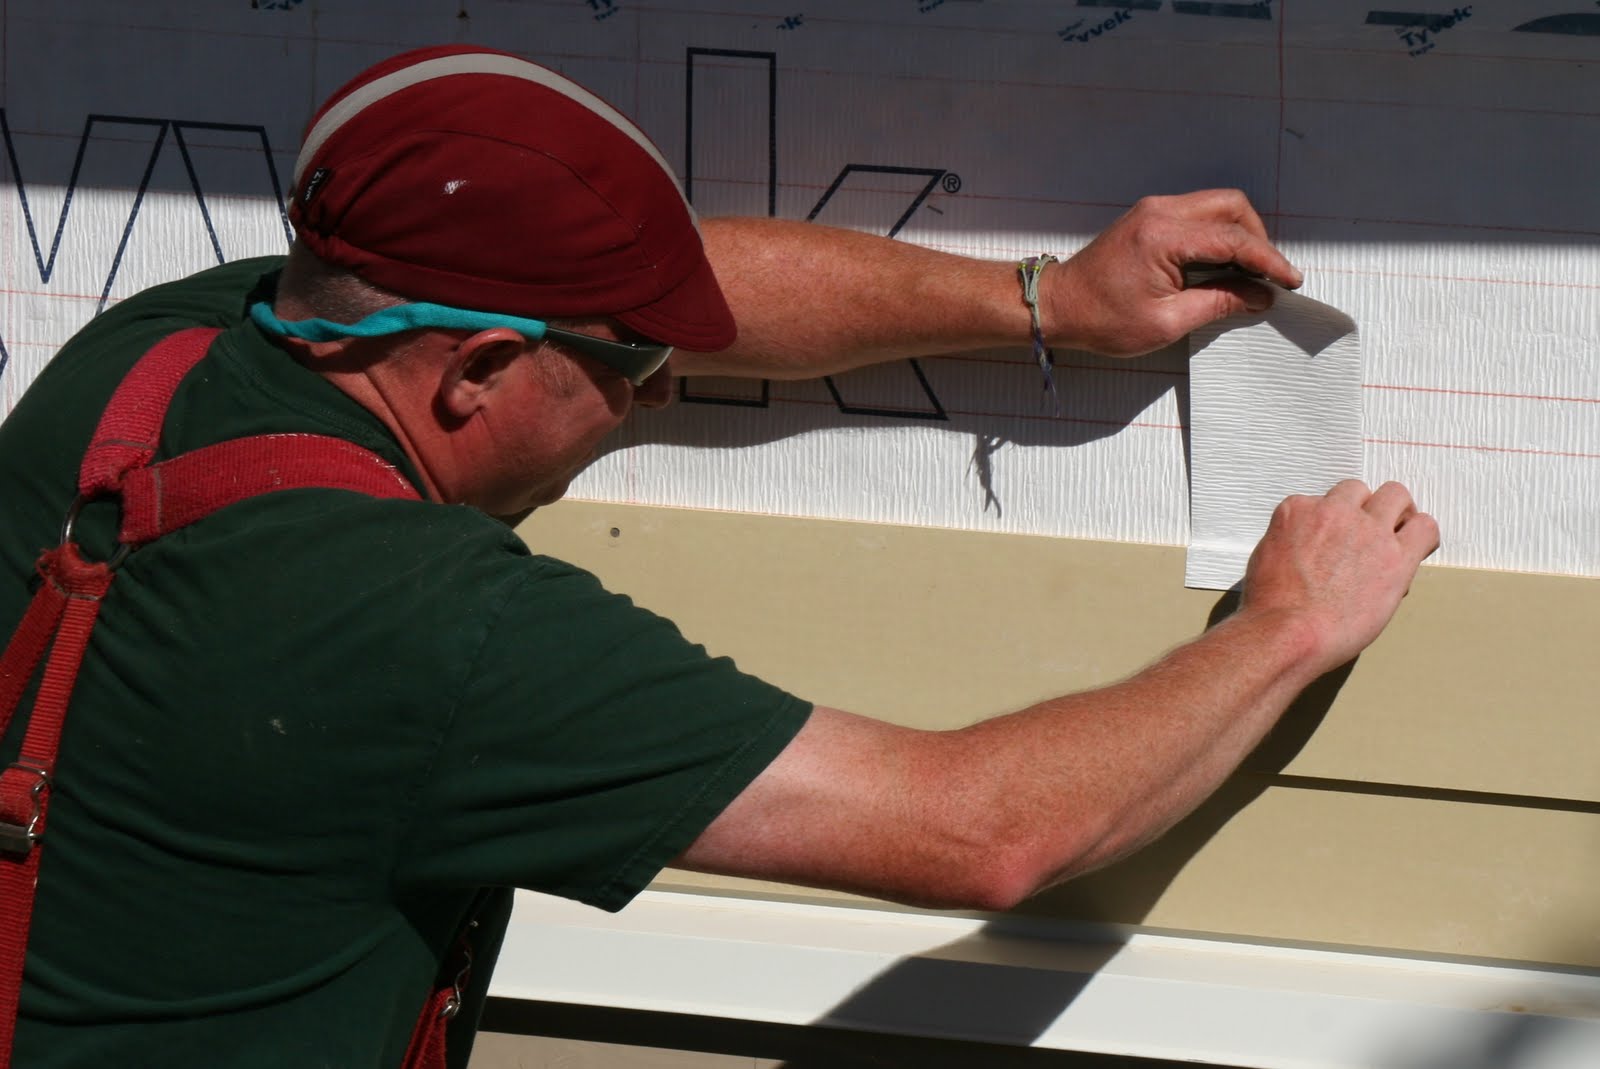
| During the week, the crew also began closing the soffits with tongue and groove pine boards. Running down one side of each soffit is a metal vent that enables the soffit to "breathe." There is a concern that wasps and other small insects can make it into the soffit cavity through the vent, so we are attaching screens on the underside of the vents. |
 |
| A close-up of the soffit vent material |
 |
| Sue, Maya, and Zoe visited to see the new colors. They gave us A grades on all colors except that, on the electric blue in the bedroom, Sue and Zoe agreed with the BB and the BP and gave it a D-, while Maya loved the color and gave it an A+. |
 |
| Our garage has become a sardine can on steroids. It began as a nicely organized place to store appliances and other items that will be recycled into the remodeled house. But as other items, including various pieces of equipment and various other fixtures for the house have arrived, everything goes in the garage. At this point, the easiest way to get from the front of the garage to the back of the garage is to swing on a rope from the rafters. Although you can't see much in this photo, what Sue, Zoe, and Maya are looking at with great interest is the array of boxes and parts that constitute the elevator. |
 |
| The very large steel object in the left half of this photo is one of several components of the new elevator. We're not sure which component because the rope on the rafters doesn't swing that far. |
 |
| This photo, taken from the front of the garage, shows more elevator components, some of them housed in the large box in the center of the photo, other parts lying on top of the box and to the side of the box. |
 |
| The day after the elevator parts arrived, several of the interior doors arrived. For most rooms in the house, the interior doors are simple single-paneled doors that have been pre-primed at the factory. One of those doors is shown at the right. The door on the left is a douglas fir door with a complex design in the upper pane of glass. This will be our front door, and our current plan is to have a natural finish on this door. |
 |
| We are very proud of this window. It used to be the window to a downstairs closet that has been eliminated as part of our remodel. It is a beautiful window with nine lites in the glazing, and we hated to lose it. So it now is a prominent part of our upstairs closet. |
 |
| This is how the rear of the house looked at the end of the week. You can see the recyled window hiding behind the scaffolding in the left of the photo. This photo also shows how the lap siding has progressed on the south face of the house up to the point where we will be installing the top bellyband, and, above that, HardiePlank shingles. |
 |
| The front of our house at the end of the week showing progress installing window trim and siding on the east side of the house. |
 |
| This photo shows progress at the end of the week with window trim and siding on the west side of the house. |
 |
| We end the week with an update on the life of a fork on a construction project. This photo appeared a couple of blogs ago as an illustration of curious items of equipment that turn up on a job like this. See the following photos for developments in the life of this fork. |
 |
| This photo was taken on Monday. You will see that water has been added to the banquet table, which is nice. The fork, however, has been relegated to a lesser role at the base of the table. |
 |
| This photo was taken at the end of this week. About an inch and a half of the handle of the fork is barely visible at the base of the table. A memorial service will be held some time next week. |