Sunday, September 16, 2012

Week 20: Nearing the Start of the Finish Line


We are entering a phase of construction where various "finish" operations are starting to happen--drywall, exterior and interior trim, painting, etc.  This past week the drywallers completed all of the sheetrock installation, taped all the seams, and applied two coats of "mud" to the taped seams.  This photo shows the open passage between the dining room and the kitchen, as viewed from the dining room.


The same open passage viewed from the kitchen.


This photo shows the new bedroom windows, viewed from the inside.

  The final step for the drywallers is a thorough sanding of all surfaces, but this can be done only after the "mud" has completely dried.  Starting on Friday and continuing throughout the weekend, the house is humming with a variety of heaters and fans.  In this photo, the appliance on the left is a heater, and the other two appliances are fans.


Although it was 82 degrees outside when this photo was taken, the gas fireplace was in full operation to help with the drying process.


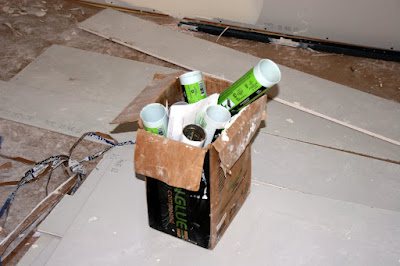
The plans called for soundproofing between the BP's office and the BB's office.  This was out of concern that one of those offices would be very noisy.  In one of the few glitches to occur during this project, the drywall was installed without first backing it with soundboard material.  Dylan did some late night research on the Internet and found that Green Glue is as good as sound board.  Think of a peanut butter sandwich where the peanut butter is Green Glue and two layers of drywall are the two pieces of bread in the sandwich. 


A close-up of one of the Green Glue tubes.  This is amazing stuff.  A thin layer of Green Glue is sandwiched between two layers of drywall and provides a sound barrier.  This is one of those occasions where we came across something that IS rocket science!  Sound waves approach the thin layer of Green Glue and there is a chemical reaction within the Green Glue that converts the physical vibrations to a tiny amount of heat.  So the sound waves go away, and whatever noise that created the sound does not penetrate the Green Glue.  Of course, we're not sure that Green Glue has ever been tested next to the BP's office.


No electrical work this week, but the mast for the main electrical service was taken down and lies next to the house, awaiting installation of the new electrical service next week.


Construction guys leave an amazing amount of stuff lying around.  This fork has been here for about a week.  We're thinking of making it a permanent landscaping feature.


This photo shows a number of new developments occuring during the week.  First, you will see that the bedroom window--the largest mulled unit in the house and quite difficult to install--is now in place.  You can also see that a scaffolding has been constructed, which the crew will be using to install exterior trim and siding.  The horizontal piece is adjustable, up and down the two vertical rails.  Finally, on the left, a very large set of work tables and saws has been set up for sawing pieces of trim to size.  Daniel and Tim are at work on trim in this photo.


A closer look at the new work area, with Dylan on the left and Daniel, far right, working at the long work table, and Tim in the center, dado-ing a corner board for the special lap joint installation that Dylan has devised.


Dylan working on trim for the exterior door that will provide access to the elevator.


Looking at the exterior elevator door from inside the shaft.  Needless to say, we don't plan to open the door until the elevator arrives.


Looking down the elevator shaft from the second floor.


Another exterior door that was installed this week is the door from what will become the back porch into the dining room.


A view of the new back door taken from inside the dining room.


We also got two new living room windows this week.  They are double-pane picture windows that replace older windows that had become loose and leaky. 


Viewing the new living room windows from inside the living room.


Dylan and his crew devoted much of the week to installing window and door trim throughout the entire first story.  It's necessary for window trim to be in place before they start installing siding.   This is a view of three of the windows on the west wall of the house.

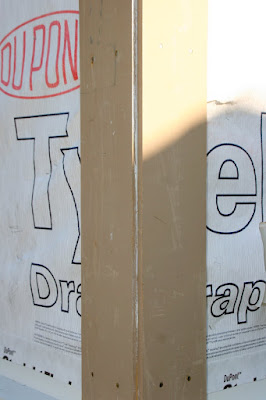
This photo shows the trim on the large picture windows in the front of the house.  You may notice that the white drain wrap is only applied to the first story of the house.  This is because siding is installed from the bottom up.  Once siding has been installed throughout the first story, drain wrap will be applied to the balance of the house and the siding will continue to the top.  In this photo, the BB is picking up nails, screws, staples, and a variety of other objects that litter the grounds in a project of this kind.  This photo also shows a first story corner board.  In addition to window and door trim, all corner boards and "belly bands" need to be in place before we start siding. 


Although it's a little hard to see in this photo, this is a close-up of the corner board shown in the previous photo and shows the lap joint devised by Dylan.  It is a tighter joint and, we think, more attractive than a joint where the two boards butt up against each other.

This is a view of Mt. Baker, taken today from our other dining room.  Next week, a lot of exciting things are planned, including installation of our main electrical service, the beginning of siding, and, with luck, the start of interior painting.  Stay tuned.

No comments:

Post a Comment